In the past two or so years since I’ve posted things have changed. New house, new baby and most importantly new blog! The projects are bigger than ever before.
On the List: Catching Up to Crocheting
19 JulWooo Weee what a week it has been. I had a VERY large wedding cake to do and it completely took over all aspects of my life (and most of Luke’s). Cakes are one of those things…. they can be very stressful when you are in the middle of pounds of buttercream, but once they are all put together and delivered… magic.
My paper project got put on hold, but that didn’t stop me from finding a few new projects to add to the list.
Cake Pops
So pretty much everyone in the universe knows about Bakerella’s Cake Pops. Most of us have found some time to make our own.
What can I say, I’m a little behind everyone else in this respect. But I have tons of cake scraps left from the wedding cake and enough icing that I’m going to attempt whipping up my very first batch. Now I just need to decide on how I want to decorate them…..
I’ve talked about Creature Comfort’s Guide to Better Blogging before. Such an amazing series of posts to help out newer bloggers. In the most recent post Ez shares some of her own tips and tricks to stay organized.
I believe organizing is the only way to stay productive in any area of life (at least for me) and I’m excited to try out EZ’s recommendation of wishpot to keep track of all links and content that catch your eye.
Luke and I caught the author of Restoring a House in the City being featured on the local channel on our television quickly. We don’t have cable and seldom actually watch any random t.v. shows, but this one caught our eye.
Ingrid Abramovitch is a journalist who has worked with various publications, including Martha Stewart Living. Her new book, Restoring a House in the City is full of beautiful photos and practical information on how to retrofit an old home while keeping and enhancing the character.
*sigh* I could spend hours dreaming of renovating an old Victorian home. I’m lucky enough to live in a city with a wealth of history, and no shortage of old homes that could use some love. Until the day comes when Luke and I can buy one and reclaim it for modern times I’m going to pick up this book and pour over it.
 Crochet Chevron Blanket Pattern
As hard as I try to tell myself not to start up too many new things at once I have been seeing so many amazing crochet patterns around that I’m starting to catch the bug.
I love the look of this chevron blanket from Coats Crafts, it would look so simple and elegant in tone on tone or really eye popping in some bright contrasting colours.
I’m excited to be done that wedding cake and be able to move on to some other projects. Now maybe I can get around to that paper making!
Tutorial: Fridge Dry-Erase Board
12 JulLuke and I have been trying to find a solution to our grocery list for awhile. We find Post-It notes are perfect to jot down what we need and take with us as we go in and out of stores. However leaving the little sticky pieces of paper all over the fridge to write down what we need as we notice, wasn’t really working for us.
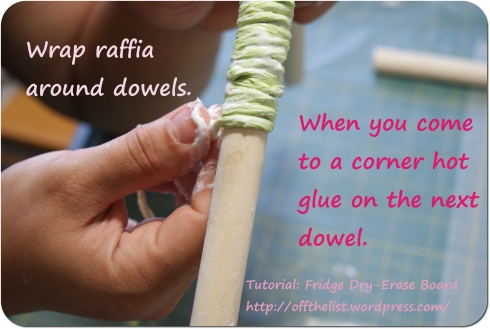
So I turned to my old friend raffia (which you might remember from the Raffia Bowl Tutorial). While I was at the Dollar Store stocking up on more raffia I found a package of three sheets of dry-erase board. There were 3 11×14” pieces. Now these were much too big to be putting on the fridge, but once I cut them in half they were perfect!
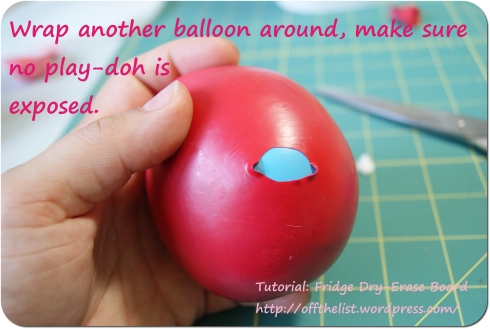
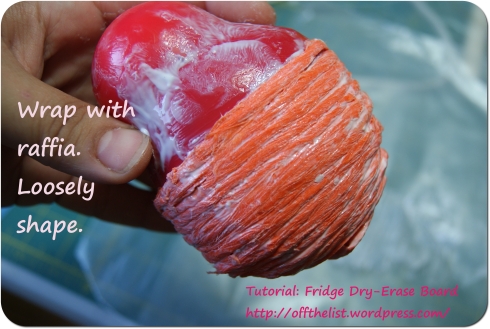
Looking at the 5 left over pieces I decided to make a frame for the dry-erase board that I could slide them in and out of. That way once one board is past its prime and no longer looking very nice I can easily replace it with another one.
I love the bright colours the board adds to my kitchen, I even made a little holder for the post-it-notes so that we never have to go searching for them. Now as we notice we are low or out of things we can quickly jot it down on the dry-erase board and when we go out to run our errands it only takes a moment to write out what we need to get on the post-it-notes.
Materials:
1. Mod Podge
2. Play-Dough
3. Raffia
4. Baloons
5. Wooden Dowels
6. Post-It Notes (for size reference).
7. Dry-Erase Boards
In case anyone uses the Post-It Note system that I do here’s the instructions on how to make the little holder for them.
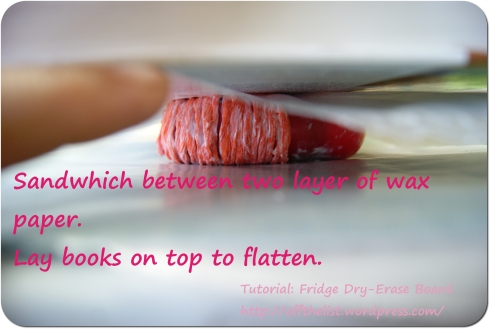
Let it dry completely, you can add another coat of Mod Podge to stiffen it up. Add some magnets on the back and call it a day. Wax paper works great for drying anything covered in Mod Podge, its easy to peel off.
I didn’t cover some of the basic parts involved in using raffia in this way. If you’d like a little more direction check out the Raffia Bowl tutorial, it’ll tell you all you need to know.
Anyone else use Post-It notes for their errand runs? Different methods? What works for you?
On the List: Vintage Stitches & Stenciled Dishes
12 JulOh the goodies I have found online this week! It’s an exciting mix and I’m going to get right to it.
Vintage Embroidery Pattern
I stumbled on this adorable pattern from doe-c-doe early in the week. My embroidery skills are still in their infancy and it’s cute little details like these that has me motivated to get to the next level. There is just something about vintage images that melt my heart.
I don’t know why but as soon as I realize something can be made from hand at home I can’t wait to dive right in. Judging from the popularity of all DIY topics I can tell its something a lot of us share.
When I saw this review of a book about making soap from Craft Critique I had to tell myself not to jump the gun. I just picked up a book on another hand made project (more about that later) and I have to tell myself, often, that you can only do so much at once. So making soap is now on the list.
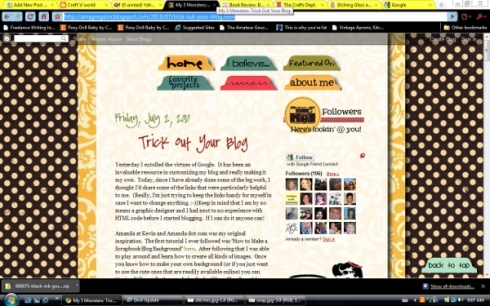
I’m always on the look out for ways to improve Off the List. When I decided to start up a blog I knew there was a lot of work in store. I am now just starting to see that working on the blog’s appearance and layout is an on going thing.
My 3 Monsters did up a post with tons of advice and links for different aspects you can put into your blog to make it stand out and make a statement.
 Using Martha Punches for Pillow Stencils
I’ve always been a bit of a Martha snob. I didn’t really GET why everyone was so excited about the whole Martha empire thing. Slowly I’m being converted to the dark side. I started peeking around The Crafts Department and came across a little post about stenciling. I didn’t find it all that exciting, same old information about using freezer paper, but then I saw these pillows.
Those punches are flipping expensive. Even when you pick them up on clearance. But they do have some amazing design and detail and now that I have another great use for them (other than just paper craft) I can justify spending the money a little easier.
They also have a little post about using the punches in a similar way to add very pretty details to glasses using etching cream. Such an easy way to dress up plain dishes!
A great week of crafty finds.
I had a little splurge shopping at Michael’s this week and Luke pointed out a whole section of clearance books. I picked up one on paper making. Its filled with a lot of detail information about the scientific aspects as well as pages and pages on the history of the ancient craft.
As much as the nerd in me loves reading that kind of stuff I’ll admit that I breezed past all of it the first time to get to the step-by-step process. I can’t describe how excited I am at the possibilities. I’ll have a full post up later to share all the info so be sure to check back!
Happy Sunday.
Tutorial: Upcycled Craft Storage
6 JulAs promised in the On The List post from Sunday here is the great tutorial I was talking about. I`m so excited to share this with all you other crafters out there. I know how quickly supplies can get out of hand. I can`t stand working in a mess, not being able to find the ribbon I want!
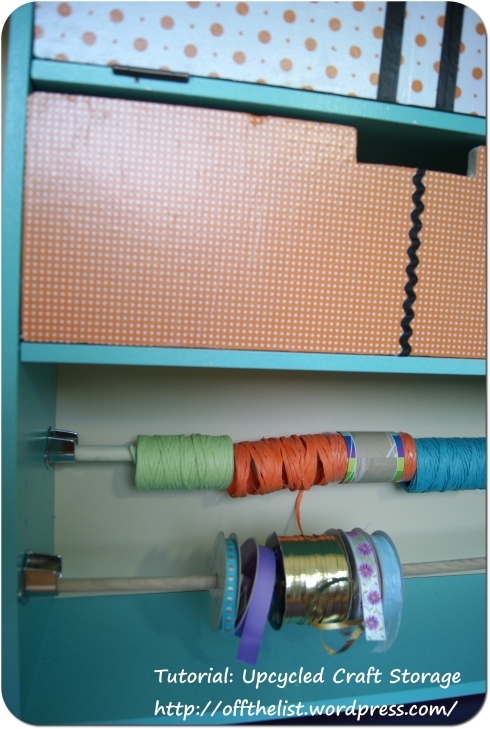
Here is a great way to upcycle any old bookshelf hanging around (or you can find one in a thrift store for super cheap). By adding tilting bins you can keep stuff tidy and out of site, but still have quick access to all your supplies. A couple of dowels helps to keep all those pretty ribbon organized while still showcasing your collection.
Lets get started.
Materials and Tools
- Old Book Shelf (any size, you can easily customize the bins to work with what you have).
- Sheet of Pressboard (very, very cheap. $20 will get you enough to do 10+ bins)
- Finishing Nails
- Hinges (two per bin)
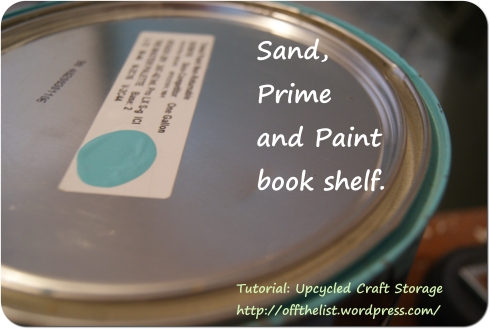
- Primer
- Paint
- Scrap Book Paper
- Mod Podge
- Dowels
- Rod Brackets (two per dowel)
- Jig Saw (we used a skill saw, but PLEASE do not try this unless you spend a lot of time working with one, like Luke)
- Palm Sander/Sand Paper
- Hammer/ Brad Nailer
- Paint Brush/ Roller/ Sprayer
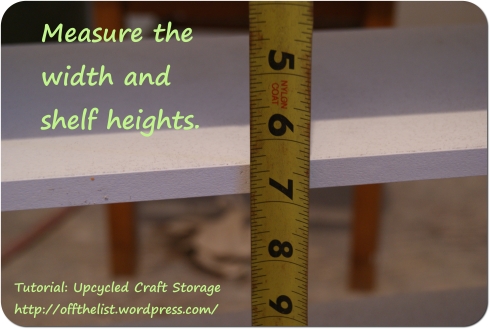
The measurements will vary depending on your shelf. You will need 4 pieces for each bin.
This little bookshelf has a long history.
It was originally a nightstand in my sister’s room growing up. Than I commandeered it and used it for storage in my bathroom when I moved out. When I grew tired of that I added some brackets, mounted it on the wall and used it to show case my (large, large) collection of sprinkles. I had almost thrown it out before I started looking for ways to add storage to the craft room.
I love that pieces of furniture which normally have such short lifespans can be kept out of landfills with some paint and creativity.
I know you are itching to get started on your own so I’ll stop distracting you. Go and reincarnate that ugly bookshelf you’ve got lying around! Be sure to come back and tell me all about it, I can’t wait to hear from you.
I’m taking part in my first ever Link Party! I’ve linked up at Strut-Your-Stuff Thursday from the great Somewhat Simple blog,be sure to hop on over and check out all the other great projects.
On the List: Learning and Yearning
4 Jul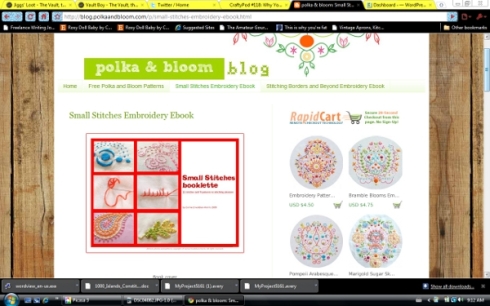 Small Stitches Embroidery E-Book
I recently blog hopped onto polka & bloom blog. So pretty! I love everything about this blog, the colours, the layout, the amazing patterns (some are even free).
I just picked up an embroidery needle for the first time recently and I’ve got a long way to go. I want the Small Stitches Embroidery E-Book to help me get there.
I love the idea of E-Books. It’s great to get information online (being paper free and all) and I love that paying the modest $10.64 price helps to support an amazing crafts person who has taken their time to share their talent with the rest of us.
I’m almost as new to sewing as I am to embroidery. I owe so much to the generosity of more experienced sewers. Almost everything I know has come from blogs. Here’s one of the next techniques that I’d like to get under my belt: Piping. Design Sponge has a great step-by-step (full of pics) on the topic.
Once I’ve figured out how to do some embroidery and add a piping finish I might try use those techniques on this project. Every year at this time my brain gets flooded with Christmas. I start envisioning wrapping paper with matching bows and humming Jingle Bells. This year is probably the worst yet.
Last year I didn’t get a chance to decorate for the holidays (we were visiting my sister). It has taken me years to gather up a few choice decor items and tree decorations, scouring the Post-Holiday sales, and now that my collection is near complete I can’t wait to set it all up. But we are still in need of stockings and I can’t wait to make up some. There’s a great pattern from Craft and Fabric Links that makes a nicely finished item (which is how I like my sewing projects to end up…eventually).
I’m almost finished with a great project that I can’t wait to share with you guys! If you are like me and you love:
a) more storage
b) upcycling old furniture
c) pretty things that you made yourself
than be sure to check by a little later and I’ll have a full tutorial up for you.
I’m SO excited to share.
Tutorial: Vanilla Extract and Sugar
28 JunIt’s flaming hot and humid here but my mind is already thinking of snow banks and holiday gifts.
Which really turns out to be pretty handy, because making vanilla extract takes some time. Not much effort, but lots of time.
Vanilla extract is a great gift to give to anyone on your holiday list who excels or even dabbles in baking. The flavor is much nicer than store bought extract (which often has water or additives). And the best part is you can get two gifts for the price of one. Once you are done using the beans in the extract you can use them to make some vanilla sugar.
You can use any alcohol you want to make vanilla extract. As long as it is at least 40% proof. The most used alcohol is Vodka, because it has no flavor of its own.
I like to use Rum. It brings its own flavor to the mix, which adds another level of complexity to the extract. Plus the sugar from the molasses helps to speed up the extraction process.
A good ratio of beans to alcohol for single fold vanilla is 3/4 pound of beans to 1 gallon of alcohol. You can of course make your extract stronger. Double fold (which is used by bakers) is twice that (duh). I usually make mine somewhere in the middle.
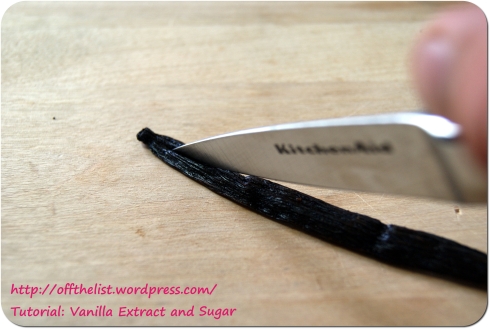
Split each vanilla bean down the middle.
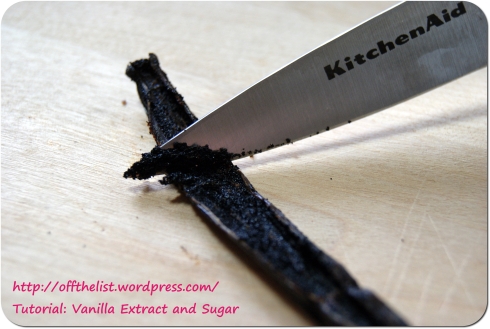
Open up the bean and scrape out the seeds.
You want to sterilize the jars you will be using by putting them in a large pot filled with water and bringing it to a boil. Boil for 10 minutes and you are good to go. I find large Mason jars work perfectly.
Place the beans and seeds in the jar. Top up with the alcohol of your choice (a shot or two for you is always good too).
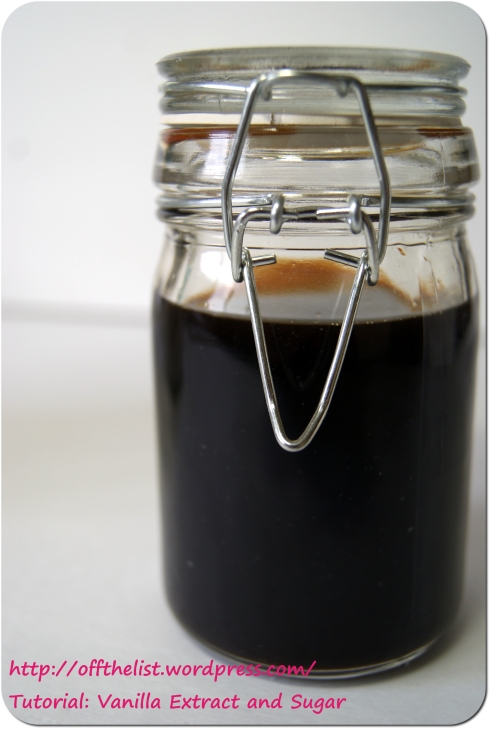
Shake the jars really well and then place in a cool dark spot. Take them out each day or so and give them a good shake. After around a month you can switch to only shaking them around once a week.
After a while you will start to see the colour deepen. Take off the lid and smell the developing vanilla flavor. How awesome is it that you are the one responsible for this process? And how much better is it that all it took was 5 minutes of work on your part!
After three months the extract will be full of flavor and ready to go. You can always leave the beans in and keep topping up with alcohol and new beans. This is great to keep for yourself, it’s a never ending supply of vanilla extract.
If you are making them up as gifts bottle them up into cute little individual bottles. Mine are from the dollar store.
Don’t throw away the beans, they have got plenty of flavor left in them. Dry them off and grab some sugar and another Mason jar.
Toss the beans and sugar in the jar, give it a shake. After a month you will have another gift to pass along to the bakers on your list. But make sure you keep some for yourself.
Vanilla sugar is a popular ingredient in some old European recipes. I have a great Apple Cake recipe that I picked up from a co-worker’s Oma that just isn’t the same without it.
But really you can use it in any number of ways. Sprinkled over fresh berries, in whipped cream, any where you want that delicate vanilla flavor to add a little something special.
Take a few minutes now and come December you’ll be thrilled to have these great gifts to give out. All you have to do is have some fun decorating them for the season and watching the smiles bloom on your loved one’s faces.
Trust me, everyone loves hand made gifts. And hand made gifts you can bake with are just that much better.
On the List: Organizing and Embellishing
27 JunWow summer always seems to fly by so quickly. July is going to be here very soon, and after that we are into August! I hope you guys are trying to squeeze every last drop of fun you can out of these few months. I know I’m doing my best.
I didn’t get much time to scour the blogsphere this week, but the time I did spend was well worth it. I found some amazing ideas and projects hidden in long ago posts by some great bloggers.
First off *The Graphics Fairy* is an astounding blog to begin with; offering beautiful vintage graphics for free. I also discovered this great little project. She uses the process to make Vintage Bird Knobs. I might try something similar or use the technique in a totally different way. I’m not sure yet, but I can’t wait.
My craft supplies are growing. Quickly. I’ve heard this is one of the dangers of being a craft enthusiast. Before it gets too out of hand I’m going to start devising ways to organize it all. I found this tutorial from Centsational Girl from eons ago. It might be old to some, but it’s new to me! I have an old small book shelf unit that I’m going to convert into an organizing station for my ribbons and I’ll be stealing some of the ideas she so graciously shares here.
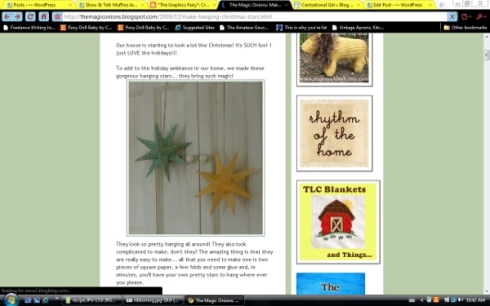
I discovered a great blog the other day: The Magic Onion. While searching across all her fun projects I came across these paper stars. There arn’t enough exclamation marks in the world to convey how in love with these I am. I’ve already bought the perfect scrap book paper to make a whole bunch. I can just imagine how great they would look around the house for Christmas, but I’m going to be using them to add some fun to my craft room in the mean time.
I’ve got a few other projects On the List that arn’t from fellow bloggers. The main one right now is trying to nail down Christmas present. I know it seems silly to be thinking that far ahead already. But the summer goes quickly, and once fall comes you can find yourself running out of time. Plus when you are making hand made presents its always best to make sure you’ll be done earlier, that way you can spend the holidays with your friends and loved ones instead of cooped up in your craft room, glue gun in hand.
I’m going to be putting together some vanilla extract for fellow bakers that are on my Christmas list. Look for a great tutorial on that later this week.
Show & Tell: Muffins Are Cute Too
27 Jun
I was recently on a hunt on google for something to do with muffins. I can’t remember exactly what I was searching for, but that’s not important. What I did find was that if you type ‘muffins are’ into google it auto populates with the expression ‘muffins are just ugly cupcakes’!
I just couldn’t let that slide. As a baker, I believe all baked goods deserve equal oppertunities. I know that cup cakes have been all in vogue for the last little while. In fact that craze is still going strong up here in Canada (we are a little behind). And I think it’s only fair that we give muffins their own fair shake at inducing little moments filled to the brim with cuteness.
All it takes is a little creativity on our part. That and a pop-over pan and some fondant.
There is my favorite recipe for Banana Chocolate Chip Muffins. This is from a book I’ve been carting around with me since I was a kid. This recipe is one of Luke’s more frequent requests. Of course I’ve tweaked the recipe here and there over the years.
Fill up the pop-over pans to the top. About 1/2 a cup.
Bake them off and they turn out the perfect shape to add cute little fondant accents to.
I dare anyone who sees these to ever say that muffins are just ugly cupcakes.
FYI: Gum Paste Carnations
23 Jun
As promised, we’re going to get back to our FYI: Gum Paste series now that we know everything we need to do harvest, jam, puree and freeze local strawberries. Don`t forget the newest Cookie Cup: Strawberry Shortcake.
In our first FYI: Gum Paste posts I showed you some of the basic and best tools to use as well as how to simply make gum paste. In the second post we did a fun little project, learning how to colour, roll out, texturize, and extrude gum paste, as well as how to cut out letters. Today we are going to dive into one of the most rewarding ways we can use gum paste: flowers.
Gum Paste Carnations

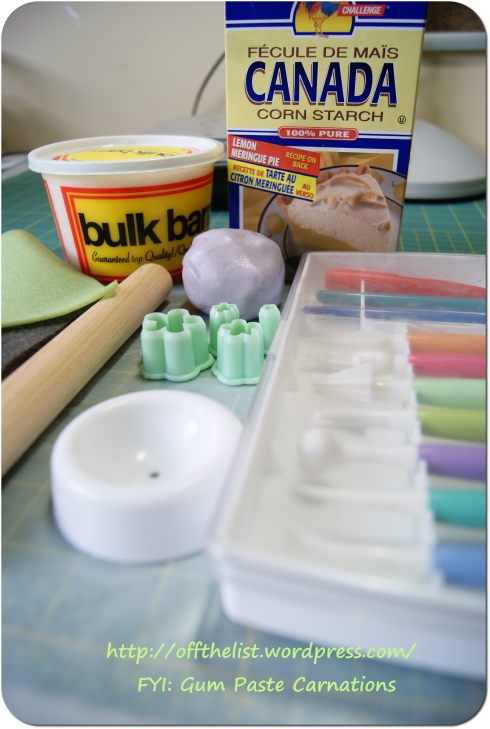
If you haven`t worked with gum paste before it`d be a good idea to check out the second FYI: Gum Paste post to become familiar with some basic tips and tricks. If you have any questions about the tools needed to make these carnations check out the first FYI: Gum Paste post.
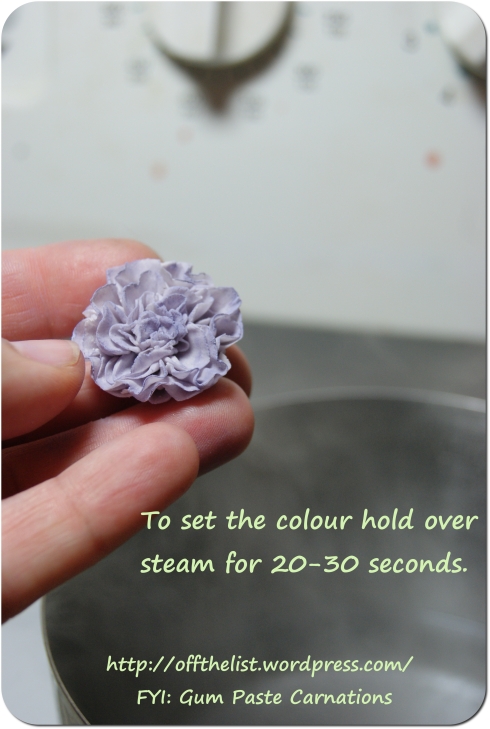
Carnations are a great first flower to start with. They are relatively simple, and their ruffly, frilly nature make them fairly forgiving for a beginner. These are perfect to add to the side or top of a cake. I`ll be using mine for accents on some pretty garrett frills I`m putting on a wedding cake in the future.


