In the last FYI: Getting to Know Gum Paste I showed you a slew of great tools for working with the sugar clay and walked you through the very simple process of making it from a powder mix. Now it’s time we get to the real fun; expressing our creativity in sugary goodness. Gum Paste is softer, more pliable, and much more elastic than fondant. It also dries very quickly, unlike fondant. Our number one ally in the struggle to keep the gum paste moist while working on it is shortening. Remember this well and you will save yourself much frustration. This FYI Gum Paste edition we will go over some gum paste basics
- How to tint to any colour
- How to easily roll it out
- How to add textures
- How to use the Clay Extruder
- How to cut letters with the Tappits
- How to adhere letters
To start rub a bit of shortening onto your hands and work a little bit into a piece of gum paste as big as you need for your project.
 Lay a piece of wax paper on your work surface. Scale the size of the piece you use to the size or project you are doing. Open the colour you wish and grab a toothpick. Never double dip a toothpick into icing colours, this is an easy way to contimante the gel. You can use both ends of the toothpicks but once they have touched the gum paste they are done.
Dip the toothpick into the icing colour and smear a small amount onto the piece of gum paste. Unless you are aiming for a dark tone be light handed. As the saying goes, you can always add more. Not so much on the taking away part.
To keep the colour from transferring onto your fingers fold the piece of gum paste in on itself. Keep folding in or roll out between your hands into a long rope and fold it in. Eventually the colour will work into enough of the gum paste that it won’t leave much (if any) staining on your hands.
Keep adding colour (be sure not to double dip!) until you are satisfied.
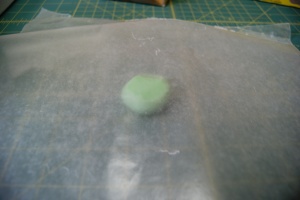
Place your pretty tinted piece of gum paste on the sheet of wax paper, cover with another. It helps to shape the gum paste to generally mimic the finished shape you are after.
Place the rolling pin in the middle and using gentle pressure roll out the gum paste. It helps if you rotate the wax paper as you go, this way you’ll roll out more evenly.

Gauge how much you need to roll the gum paste out to fit the cutter you want to use. The thinner you roll it the quicker your finished project will dry but the more fragile it will be. After a few projects you’ll start to learn what works best for you.

Remove the top sheet of wax paper and the cutter down firmly into the middle of the gum paste. Pull away the excess gum paste.
Be sure to wrap any gum paste you are not using in plastic wrap and place in a zip lock bag you keep near by. Wasting gum paste isn’t doing yourself any favors (ask me how I know.) Remove the cutter carefully from the gum paste.
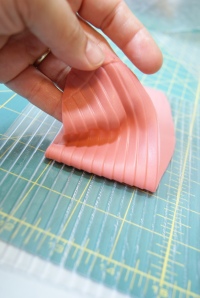
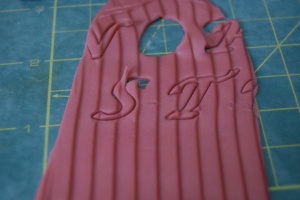
Put a light layer of shortening on the texture sheet and using a sheet of wax paper roll out a small, narrow piece of gum paste on top.
Carefully pull the gum paste off of the texture sheet.
Lay the textured gum paste down flat on your work surface (which is protected by a sheet of wax paper). Line up the letter you want on the Tappit cutter.
Press down firmly and lift up gently. If you find that some of the tricker letters aren’t cutting cleanly, spread a little shortening on the cutter itself.
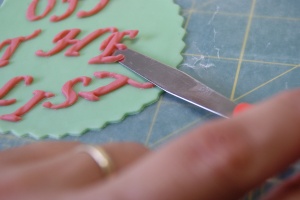
Pull away the excess gum paste (remember to wrap in plastic wrap and put in a zip lock bag) and expose the desired letter. Using a small flat tool (I use the spatula from my modeling kit but a butter knife works almost as well) carefully lift the letter off of the wax paper. You might have to wait a minute or two for the gum paste to stiffen up enough that you can move the letter without completely distorting it. Don’t worry about a little distortion, you can always adjust it once you have it in place.
Place the letters on your plaque piece and play with them until you are happy with their arrangement.
Removing the letters one by one smear a thin layer of edible glue on the back and place them back into their spots, adjusting them as you go. Once all of the letters are adhered place the plaque (wax sheet and all) out of the way and onto a flat surface
Lay down another piece of wax paper. Texturize another piece of gum paste.
Cut to the desired size using the wheel cutter/fondant embosser. This is where wax paper becomes so handy, you can easily see through it to the measurements on your rotary mat. Carefully peel the wax paper off of th first piece of gum paste and adhere it to the larger piece.
Now grab the clay extruder. Kiss it. No seriously. You are going to fall in love with this thing. When I first got mine I tried it once and almost threw it out. I had no idea how close I came to making the biggest mistake of my caking life. I’m glad I can save you the trial and error it took me to appreciate this thing.

Unscrew the cap, choose a small round die, place it inside the cap and screw the cap back on.
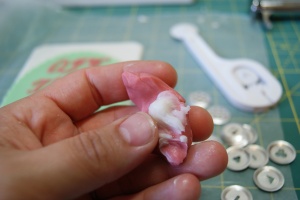
Work a generous amount of shortening into a inch or so sized piece of gum paste. You want this baby to be super pliable.
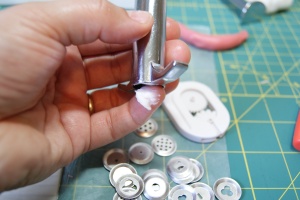
Scoop up some shortening on your pinky finger (shortening = key to success with gum paste). Coat the inside of the extruder with the shortening as far down as you can go without getting your pinky stuck. Because husbands called to help in such an emergency will take a good 3 minutes to laugh at you before they help. And that’s 3 minutes you could be playing with gum paste instead.
Remove the barrel from the extruder. Roll the gum paste into a small log and place it inside the chamber of the extruder.
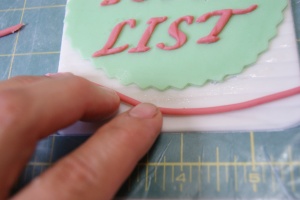
Place the barrel in the top of the extruder and push down. With even pressure extrude a small rope of gum paste directly onto the wax paper. Move the extruder as you go to prevent the rope from bunching up and sticking to itself.
Position the rope on your gum paste plaque to your liking and then use a light layer of edible glue to secure it. You can do so many things with the extruder. Most of the accent on the Baby Shower Cupcakes were done with it. It has dies that are perfect to make gum paste hair. It allows you to make a quick and simple border for the edge of a cake in seconds. The possibilities are endless. It works as easily with fondant as it does gum paste.
Sit back and smile. You now know all you need to start working with gum paste. Plus now you also know the secrets of using some of the most versatile tools in the world of sugar art. Tappits come in all kinds of fondants from funky to formal. Textures can be applied to the sides of cakes as well as accents. You will never stop finding new ways to use an extruder, and you will find yourself groveling and apologizing for ever thinking of throwing it away.
Next FYI we’ll start to learn how to make detailed and delicate gum paste flowers. I’ll warn you now, this can get addicting.
Are there any specific gum paste (or other sugar) techniques that you’ve seen and always wanted to know more about? Tell me what you’d like to see on FYI and I’ll do my best to fulfill your wishes.










Hi,
I love the tutorial pictures of the gumpaste techniques. I was wondering what size that clay extruder is that you use? Also, would a cookie press work the same way or is the gumpaste to hard?
Thanks!
I’m hooked to your blog…time to take out all those tools which I bought last year(wilton course kits 3 & 4) but never get to use but I really need gum paste recipe first…thanks for these tutorials…