Although once a foreign novelty, Fondant has become a household name in the past few years. Love it or hate it, doesn’t matter, you know what it is.
Gum Paste is it’s more temperamental, and rewarding, counterpart. It’s a sugar clay that you can mold and craft into anything imaginable. It’s different from fondant in the fact that it dries hard, really very hard. In fact it can dry before you want it to, while you are working on it. But unlike fondant it holds its shape and you can roll it much thinner than it’s easier cousin.
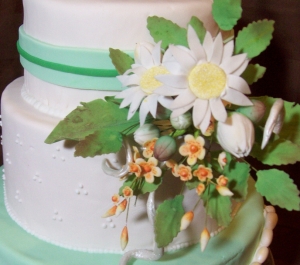
Gum Paste flowers are the most traditional application for the sugar clay.
Bows are becoming more and more common.
(Sorry about the quality (or lack of) of some of these pictures. They are from before I had my life altering SLR or any real photography skill.)
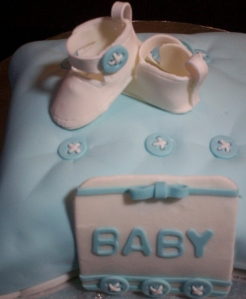
Gum Paste can be used to create an edible version of anything you can possibly want to put on a cake or cupcakes.
Stars.
And Tiaras. And yes the Roses are gum paste too.
Or a Princess.
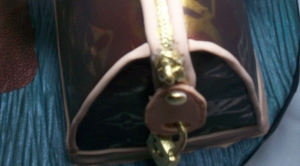
Details to make a purse cake come to life.
Hand modeling any creature you could possibly want. Even Mr. Bear from the last week’s Show & Tell began as a humble hunk of gum paste.
Some people are afraid to start working with gum paste. I was one of them. Actually I’m usually weary of any medium I haven’t played with before. That’s what blogs like this are for!
I’m going to walk you through everything you will need to know to start working with, and loving, gum paste. Then you can set out on your own and learn tons more to share with me.
Gum Paste 101
There are a few ways to obtain gum paste. You can purchase it premade, you can make it from scratch, or you can go the middle route and purchase a powder. I buy the Wilton Gum Paste Mix from the Bulk Barn. Most craft stores carry it. It makes a good sized batch that will last a lot of small projects or a few medium sized.
Beside the Gum Paste is my container of Gum Tex. You can use Gum Tex to make your own gum paste from scratch. Or if you are like me you can keep a container around to make some edible glue to keep together all your sugar clay creations.
Fondant was included in this picture, not because it’s a spot light hog, but because sometimes it helps to use 50% Gum Paste and 50% Fondant.
Large bows are a perfect example of this. You have an extended time to work on shaping because of the Fondant and it will still dry relatively hard (although it will take longer) thanks to the Gum Paste.
A perfect symbiotic relationship.
Making Gum Paste from a Mix
The instructions are clearly outlined on the back of the container. It’ll take a few times to get the feel for it, but it’s fairly simple.
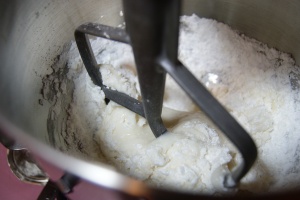
Set up your black Kitchen Aid mixer with a paddle. Open up the can of gum paste mix with a black Kitchen Aid can opener. (Can you guess what style most of my kitchen appliances/tools are?)
Empty the container into the bowl of the mixer. Add 1/4 cup of water with a black Kitchen Aid measuring cup (I’m really not joking, I do have a complete set of black Kitchen Aid measuring cup).
Set to stir and allow it to incorporate the water into the powder.
Scrape down the sides of the bowl and paddle. Notice that the spatula is a WHITE Kitchen Aid spatula. I’m not crazy enough to have my kitchen match 100%. Mind you, if anyone knows where I could pick up a black one, feel free to let me know.
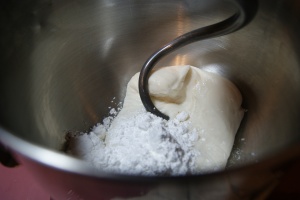
Once it starts to come together switch to the dough hook and knead until it looks like a solid dough.
Put it into a Ziplock bag and let it rest for 15 minutes.
Put it back into (the now cleaned) Kitchen Aid bowl and add 1/3 cups of powdered sugar. Knead for 5 minutes.
Congratulations! You just made gum paste.
Now, you can store it in the fridge in a Ziplock bag if you aren’t going to use it right away (wrap in plastic wrap if it’ll be a while before you get to it).
Next I’ll tell you what toys… ahem…. tools are useful when working with gum paste.
Gum Paste Tools
The tools I’m going to show you are by no means a hard wired list. My collection is always growing (and sometimes shrinking.) It’s all about finding what works for you and what you like to work with.
That being said, a lot of these are tried and true tools that I saw recommended by a lot of other cake designers and sugar artists before I shelled out my dollars to buy them. They are the ones I use the most and the ones I think you would get the most use out of as well.
Icing Colours are necessary, luster and petal dusts are lovely, but for the most part I have found the Food Writers to be useless. These arn’t a top quality brand though, the point is very blunt, and I think that is the problem.
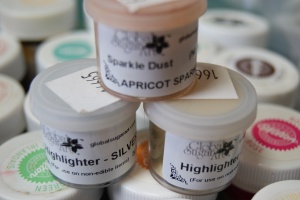
The Silver and Gold highlighter have got to be my all time favorite and most used of all my dusts. They add bling to any cake. And we all know that bling is always a good thing.
Out of all of these the two most essential and enhancing to any gum paste work are the Extruder and the Tappit letter cutters.
These are all (except the three white ones) from a basic Wilton Gum Paste kit. It’s a great place to start until you decide on which kind of flowers you want to invest more money into and buy higher quality cutters and veiners for.
Floral wires, tapes and stamens make the difference between awkward sugar flowers and jaw dropping realistic edible masterpieces. .
When you are drying anything made of gum paste (or fondant for that matter) if you don’t lay it on some kind of mold or form it will dry flat and lifeless. These are all good for giving shape to different projects.
When working with gum paste you will save yourself alot of frustration by always having these 5 things on hand:
Cornstarch: for dusting work surfaces
Plastic Wrap: for covering pieces of gum paste you arn’t working with to prevent them from drying out
Wax Paper: to protect your work surface
Shortening: to grease your hands and re-moisturize the gum paste
Tooth Picks: to apply colours and for some fine detail work
Next FYI we will get up close and personal with some gum paste. I’ll show you how to colour it, how to use Tappits, the Extruder, and Texture Tiles.
Let me know if you have any specific comments or questions about gum paste.
Or really just any comment about anything, the weather, your dog, that strange smell you still haven’t tracked down the source of.
I’d be thrilled to hear from you.














Ok, I just added about ten things to my shopping list. =) Thanks so much for this, I’ll be linking in the next Crafty Food Roundup.
I DID track down that weird smell, some bleach in my toilet tank killed the mold. Yay me!
Yay bleach! Now if only I could track down the odd smell in my apartment… any tips?
Fantastic tutorial!!! I posted a link to this and your other gum paste tutorial on my column (ediblecrafts.craftgossip.com). Thanks so much for all the detailed information!
Meaghan, I found your blog ages ago and couldn’t find it again to add to my blog roll. I’d never imagine you’d stop on by here, but boy am I glad. Thanks so much for posting a link, there’s something great about being able to share tips with others isn’t there? Now I’m off to attack your blog, I love your creative approach to cookies.
Chyanne:
Thank you for all the tips on working with gum paste. I just started working with fondant and gum paste and I have 2 questions:
(1) How long in the fridge will gum paste and fondant last if wrapped tightly. I bought the Wilton ready use gum paste in Feb. 2010 and used it for one cake. It has been in the fridge in the sealed wrapper. I have stored my unused colored fondant in the fridge for about a month or 2.
(2) How do you seam or fix a tear in fondant once on the cake. When I am doing square cakes I end up with a spot I need to seam.
I am looking forward to your response. And again Thank you for your helpful tricks of the trade.
Kindest regards,
Anita
Hi Anita, I’m glad you find the tips helpful.
To answer your question about how long gum paste keeps, officially Wilton recommends that gum paste made with their mix be kept refrigerated for up to 6 weeks. It can also be frozen and kept indefinitely.
That being said I have kept gum paste wrapped well and in the fridge for longer periods of time and have never had a problem. If it it is made using the dry mix there really isn’t any ingredients in it that are capable of degrading, and the high concentration of sugar acts as a preservative. In addition gum paste isn’t usually consumed. Because it dries so brittle (and doesn’t have much in the way of flavor) the accents are usually pulled off and set aside. As long as it has been kept refrigerated and there is no change in texture or smell, it is good to use.
For your second question, I know how frustrating square cakes can be. One of the best ways to deal with tears is to try and avoid them in the first place. How thick do you roll our your fondant? Too thin and it can’t hold together from its own weight when you pick it up to transfer it onto a cake. Also when you are transferring it after you roll it out, do you use a fondant mat or piece of wax paper to support it? This can make a huge difference.
If you do find that you end up with a thin tear if you gently rub it with your finger, that has been dampened with a little water this can melt the sugars of the fondant and the two piece will adhere back together. If it is a larger tear you can use royal icing in same colour to fill in the gap and smooth it down to match the thickness of the fondant.
Here is a video showing how cover a square cake with fondant, it’s all about being patient and letting the fondant decide where it wants to go. I find once you figure out how to do it like this tears become a thing of the past. Nati’s Cakes are amazing, and she makes covering cakes look like child’s play, but it takes tons of practice.
I hope this helps, if you have any other questions I’d be happy to answer them.
I were like to know, can gum paste store in the fridge after you had finish designing your cake?
This is great. It’s very helpful. A question did pop up with the stars on wire, however. I’ve seen the wire put directly into the cake a couple times but I’ve also read that putting wire into a cake is a terrible idea because the wire is not food safe. What are your thoughts on this?
Hi Cheyanne, thanks for such a useful post. Cake decorating is my new hobby, I love to make cake toppers & decorations with fondant but never worked with gum paste….do u have a recipe for home made gumpaste & also does the decorations made with fondant and/or gumpaste can be placed on top of cake iced with buttercream.
thanks